
ESP8266
It has Ten silica L106 32-bit RISC processor that achieves extra-low power consumption and reaches a maximum clock speed of 160 MHz
You can download based on your operation system, here i have window11 and im downloading a zip file, you can also download a installer file and install into the window.

Go to the extracted directory and open the application by double click

Application has been open

In the next step, we will setup the board

Press - OK

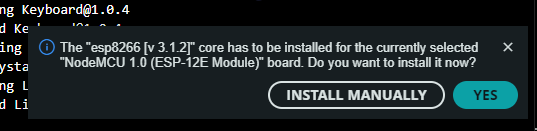
4 - Click "Yes" to install ESP-12E Module, it will take a while
5 - Select the Board and port

We can see the details


Enjoy!! Now your Arduino is ready to use
Thanks you !!
Here, I have used this is chip for extending a Wi-Fi Signal in poor Wi-Fi zone, below is the details
Project - WiFi Extender
OS - Window 11
Board - ESP8266 NodeMCU
Wi-Fi Card - ESP8266MOD 802.11b/g/n
Cable - Micro USB DATA Cable
Application: Arduino IDE 2.1.1
Lets get started our project
Hardware:
ESP8266 Node MCU Board buy from Amazon.in
Software:
Download:
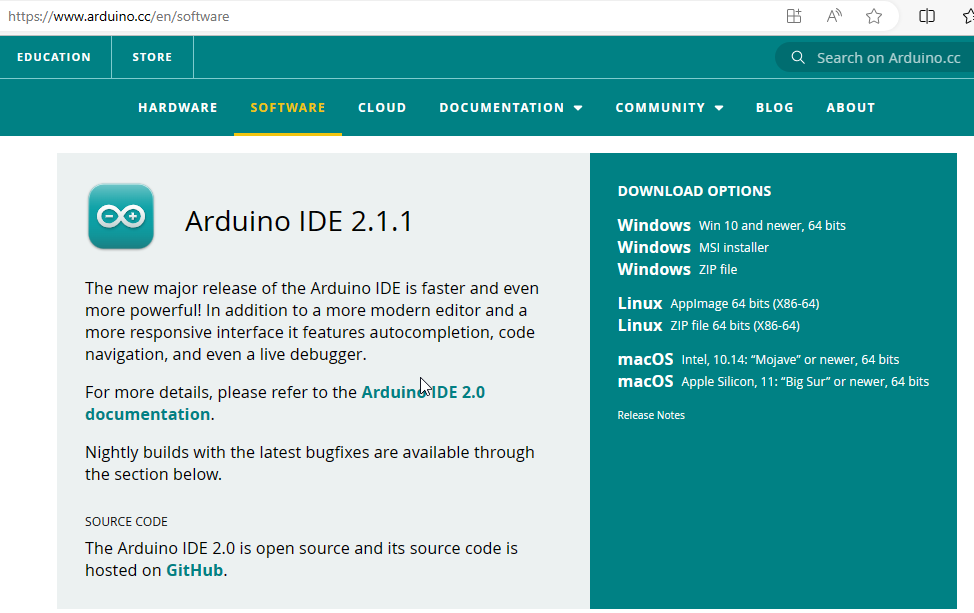
Official Website: www.arduino.cc
Open Arduino Website and Click on SOFTWARE
You can download based on your operation system, here i have window11 and im downloading a zip file, you can also download a installer file and install into the window.
Direct like of Zip : https://downloads.arduino.cc/arduino-ide/arduino-ide_2.1.1_Windows_64bit.zip
Once download, right click on zip file and extract it
Go to the extracted directory and open the application by double click
Application has been open
1 - Connect your ESP8266 NodeMCU to your computer using USB DATA Cable
2 - Install ESP8266 NodeMCU Add-on in Arduino IDE
File --> Preferences and scroll down and paste the below url
Json URL - http://arduino.esp8266.com/stable/package_esp8266com_index.json
Press - OK
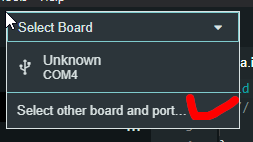
3 - Select the Board from Drop-down box, click on "Select other board and port"
Select - NodeMCU 1.0 ( ESP-12E Module ) and COM port
Note: Here I have only one connected device
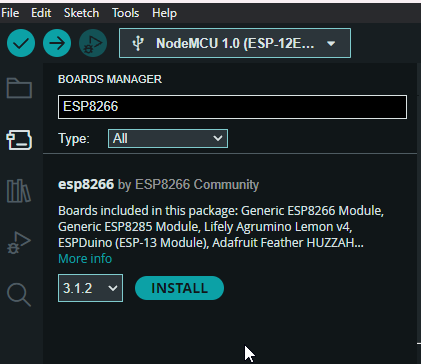
Go to Tools --> Board -> Boards Manager
Search ESP8266 Board and click on Install button, it will take a time to install
Go to the Tools --> Board --> esp8266 --> NodeMCU 1.0 ( ESP 12E Module )
We can see the details
Go to Tools --> Port and select the COM Port
Enjoy!! Now your Arduino is ready to use
I hope this topic gave you all the information you needed. If you have any further questions or would like more detailed directions feel free to contact us using any of the following sources.We look forward to talking to you.
