
Step 1:
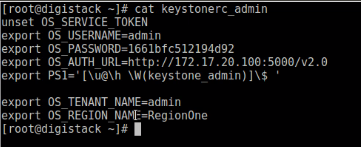
User = AdminPwd = 1661bfc512194d92 # see keystonerc_admin


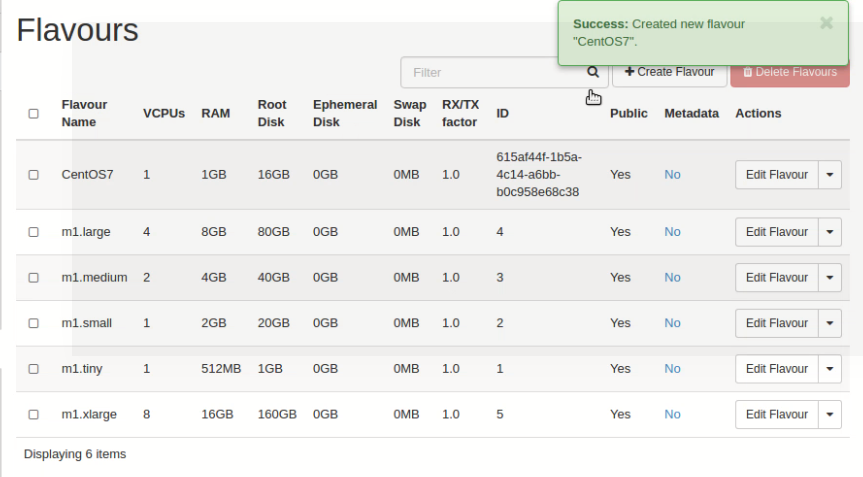
Go to → Admin → Flavours → press “Create Flavour” Button

Flavour Name = CentOS7 # choose according your project

Open Dashboard: Login
User = AdminPwd = 1661bfc512194d92 # see keystonerc_admin
cat /root/keystonerc_admin
http://172.17.20.100/
Project Window:
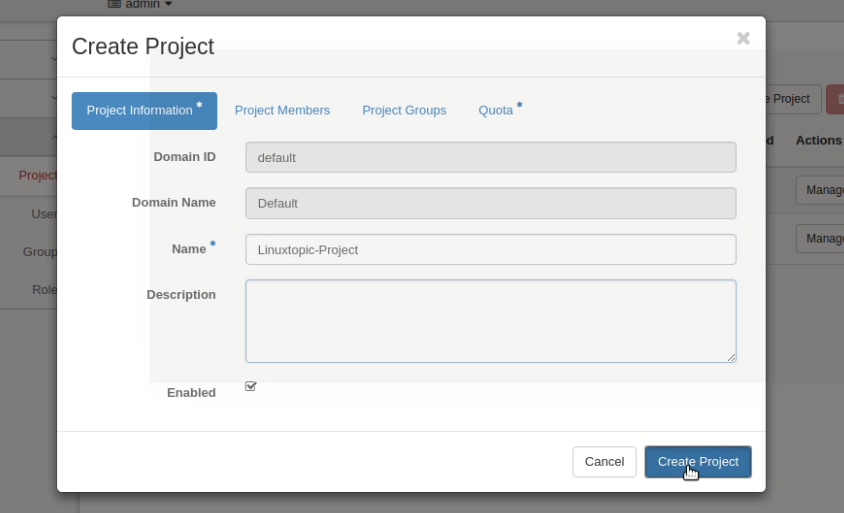
Step 2:
Press “Create Project”
Type Project Name and Press “Create”
After successfully “Create Project”
Step 3 :
Create Flavours :
Go to → Admin → Flavours → press “Create Flavour” Button
ID = auto
VCPUs = 1 # According your project
RAM = 1024 # According your project
ROOT Disk = # According your project
Go to Project → Compute → Access & Security

Step 5:
Create Security Group

Rule = All ICMP
Direction = Ingress

Rule = All ICMP
Direction = Egress
Rule = All TCP
Direction = Ingress

Rule = All TCP
Direction = Egress
Go to Project → Compute → Images

Name* > CentOS7 # Image Name
Description > # Image Desctiption
Image Source > Image # Select Image Source
Image File > *.iso # Select Your Image File
Minimum DisK > 16 GB # Type According to your Project
Minimum ram > 1024 MB # Type According to your Project
Public > yes # tick on checkbox
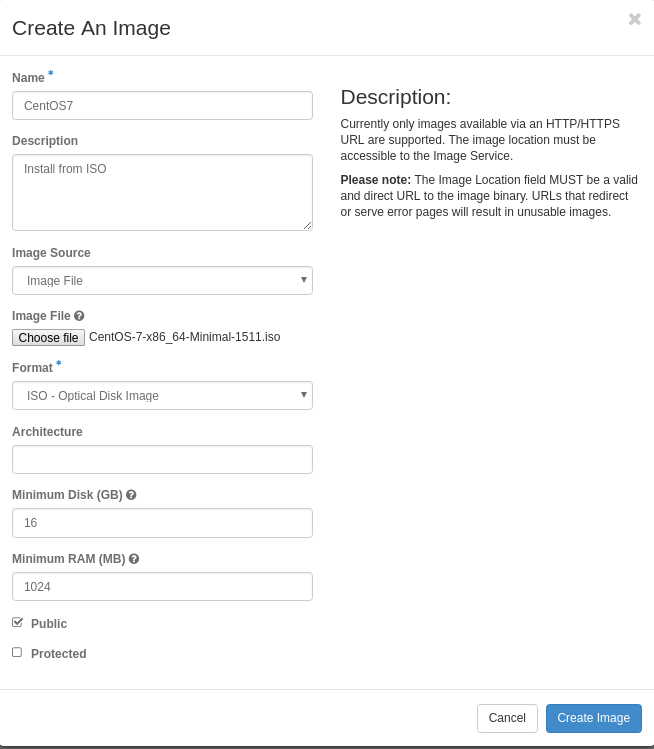
Image Successfully Created
Go to Project → Compute → Volumes
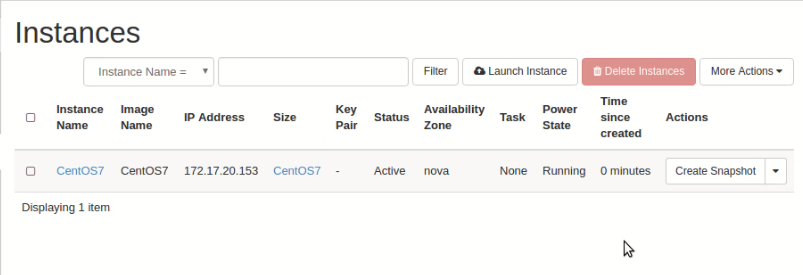
Go to Project → Compute → Instances
Press “Launch Instance”
Instance Name* > CentOS7 # Type Instance Name
Availability Zone > nova # Select Zone
Count* > 1 # Type Count
Select Boot Source* > Image
Available > CentOS7 ( press “+” button to allocated Source and “–” button to remove)

Go to Project → Compute → Volumes


Go to Project → Compute → Instances

Part 1: OpenStack Mitaka 5 installation in CentOS 7
Part 2: Network Configuration in OpenStack
Part 3: Network & Router configuration using Dashboard
Part 4: Create Project, Image, Volume & Instance
Part 5: Instance Snapshot & Boot from Volume
Part 6: Autostart OpenStack Instance Setting
Part 7: Extend Volume Size
Press “Create Flavour”
Step 4:
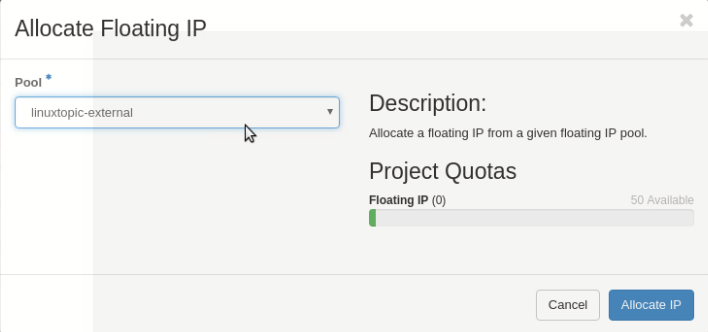
Allocate Floating IP’s to Project :
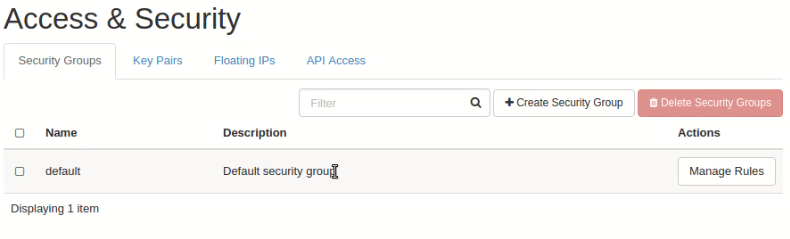
Go to Project → Compute → Access & Security
Click on “Floating IP’s” tab and Press “Allocate IP’s to Project”
Press “Allocate IP” Button
Step 5:
Create Security Group
Click on “Security Groups” tab
Press “Manage Rules”
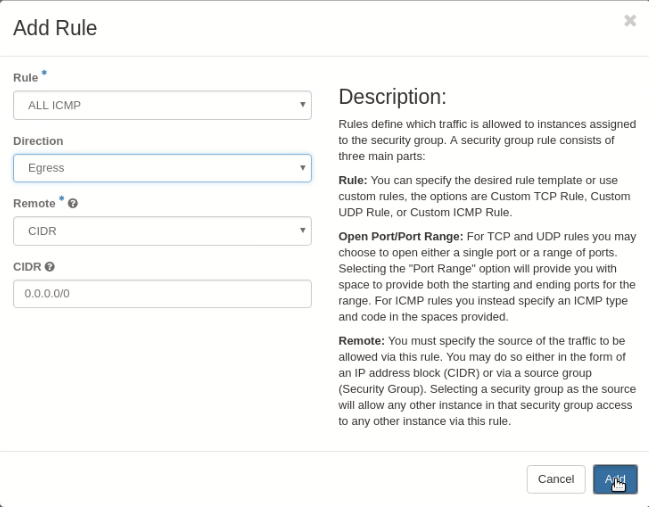
Press “Add Rule”
Rule = All ICMP
Direction = Ingress
Press “Add Rule”
Rule = All ICMP
Direction = Egress
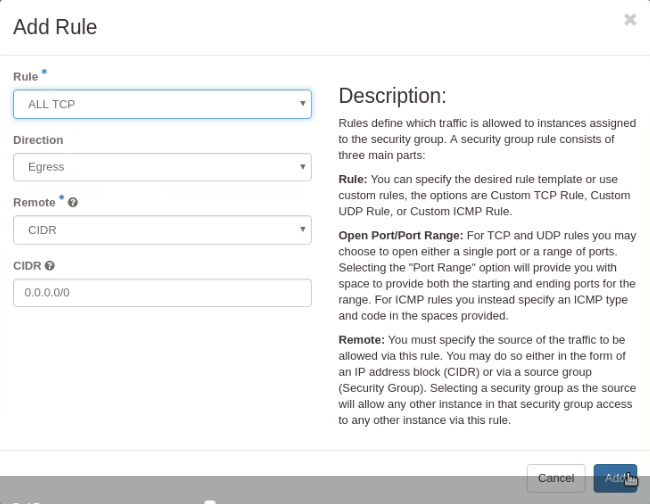
Press “Add Rule”
Rule = All TCP
Direction = Ingress
Press “ Add Rule”
Rule = All TCP
Direction = Egress
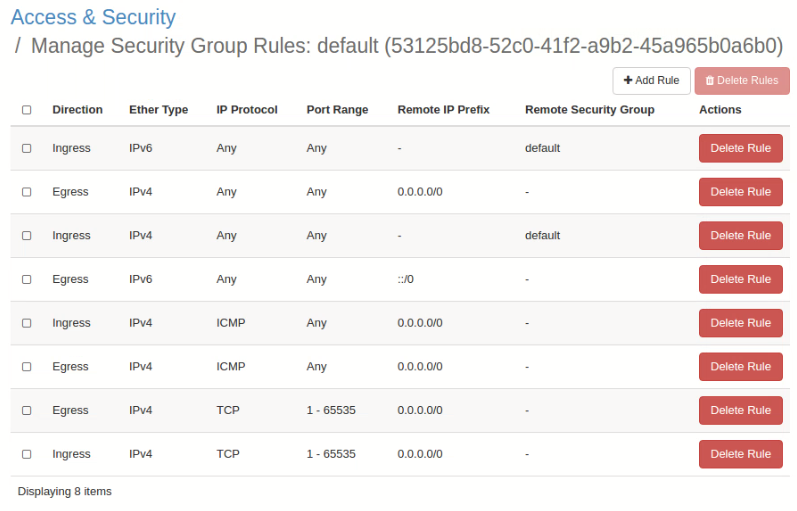
Final Output of Access & Security
Step 6:
Create Image :
Go to Project → Compute → Images
Press “Create Image”
Name* > CentOS7 # Image Name
Description > # Image Desctiption
Image Source > Image # Select Image Source
Image File > *.iso # Select Your Image File
Minimum DisK > 16 GB # Type According to your Project
Minimum ram > 1024 MB # Type According to your Project
Public > yes # tick on checkbox
Press “Create Image”
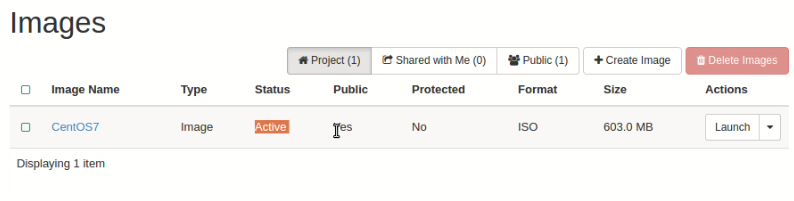
Image Successfully Created
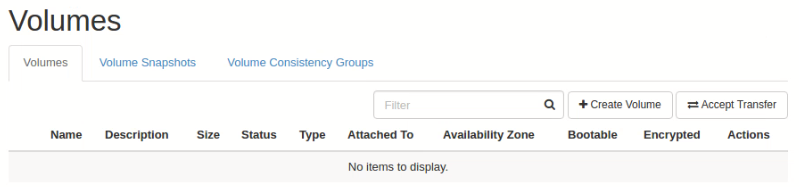
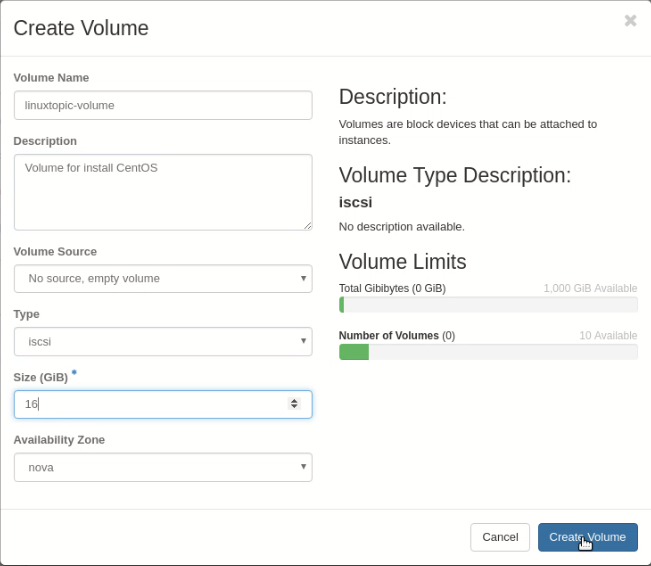
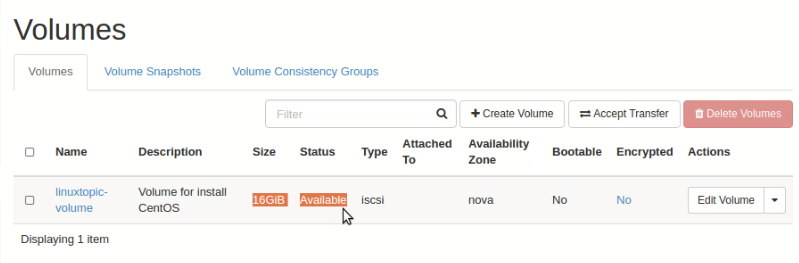
Step 7:
Create Volumes :
Go to Project → Compute → Volumes
Press “Create Volume”
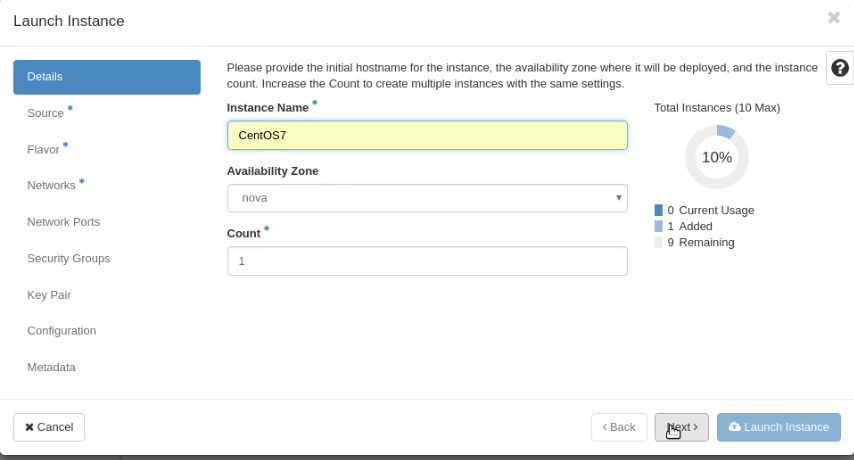
Step 8:
Launch Instance:
Go to Project → Compute → Instances
Press “Launch Instance”
Instance Name* > CentOS7 # Type Instance Name
Availability Zone > nova # Select Zone
Count* > 1 # Type Count
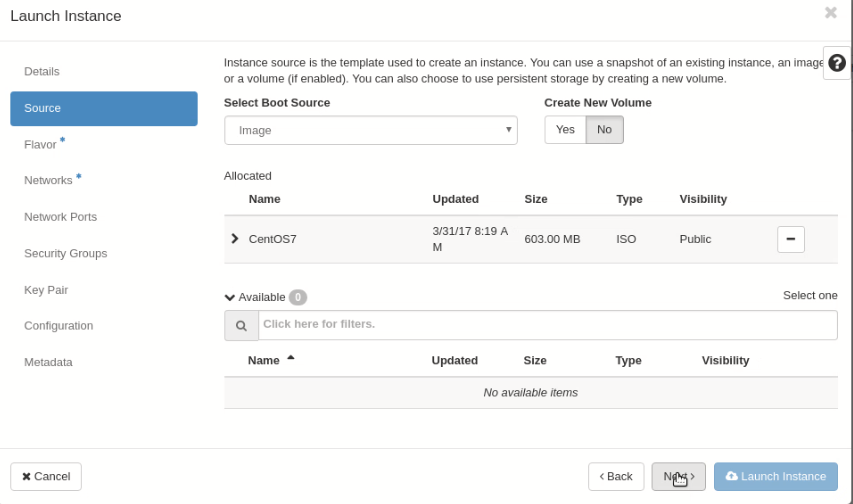
Press “Next” for Select Source
Select Boot Source* > Image
Available > CentOS7 ( press “+” button to allocated Source and “–” button to remove)
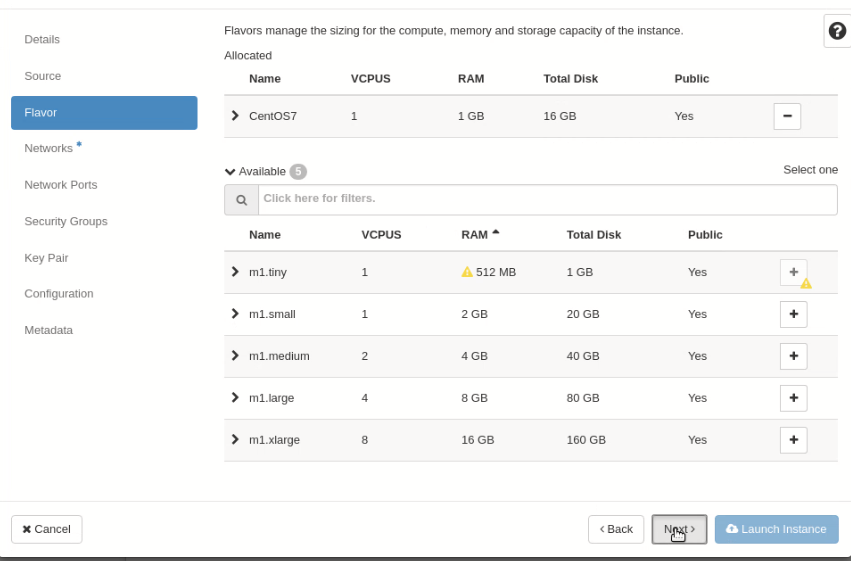
Press “Next” for Select Flavor
Available > CentOS7 ( press “+” button to allocated Source and “–” button to remove)
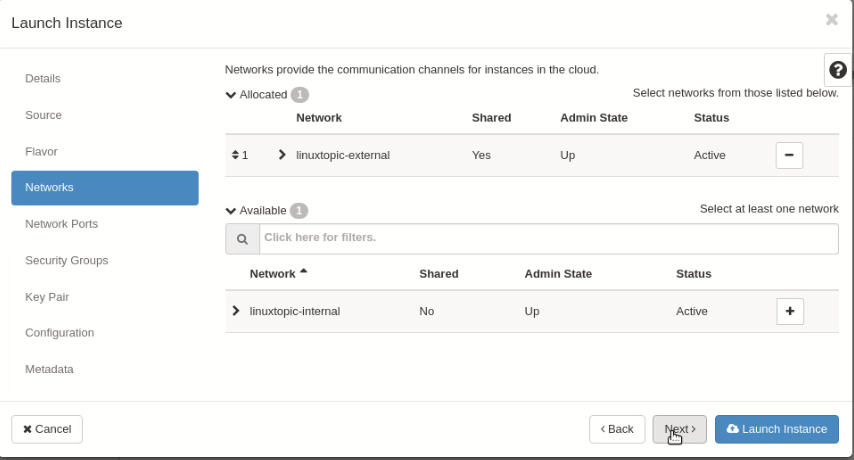
Press “Next” for Select Networks
Available > linuxtopic-external
> linuxtopoic-internal ( press “+” button to allocated Source and “–” button to remove)
Available > linuxtopic-external
> linuxtopoic-internal ( press “+” button to allocated Source and “–” button to remove)
Press “Next” and Select “Security Groups”
Available > default ( press “+” button to allocated Source and “–” button to remove)
Now Press “Launch Instance”
Step 9:
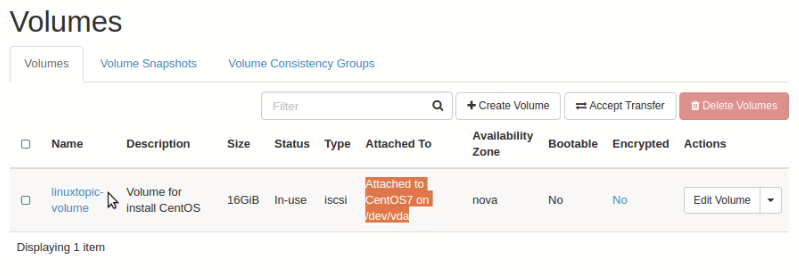
Attach Volumes :
Go to Project → Compute → Volumes
Expand Menu of “linuxtopic-volume” and Select “Manage Attachment”
Select Instance “Attach To Instance” from Drug down Menu
Press “Attach Volume”
Step 10:
Restart Instance :
Go to Project → Compute → Instances
Expand Menu → Press “Hard Reboot Instance” and Confirm
Step 10:
Now open Console from Expand Instance Menu OR Use VNC Client to Install CentOS 7
Part 1: OpenStack Mitaka 5 installation in CentOS 7
Part 2: Network Configuration in OpenStack
Part 3: Network & Router configuration using Dashboard
Part 4: Create Project, Image, Volume & Instance
Part 5: Instance Snapshot & Boot from Volume
Part 6: Autostart OpenStack Instance Setting
Part 7: Extend Volume Size
